| 1 |
For this tutorial we will create a directory / folder on our
computer called C:\Tutorials\Looping 
|
| 2 |
Put all your presentations in this directory. For this
tutorial we will just have two presentations that we will link to, (Looping.ppt is the
presentation that will loop, and linked01.ppt is the actual presentation) and our show
presentation.

|
| 3 |
Using powerpoint, save one of your presentations as
"Show01.ppt". This is the presentation that will call up all the other
presentations.
|
| 4 |
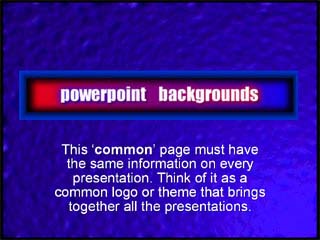
Make a common screen as the first slide in
this presentation.
It's important that any background images are actually on this page and not on the
"slide master".
It's also important that this slide is using the layout called "blank", as this
helps powerpoint from re-formatting your common slide when you paste it into other
presentations
 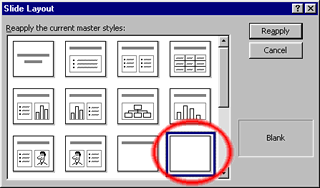
|
| 5 |
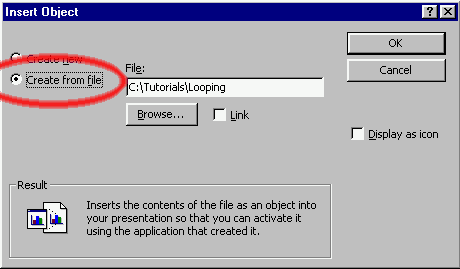
Now for the clever stuff!
Choose the Insert Menu, Click on Object and the
following will appear
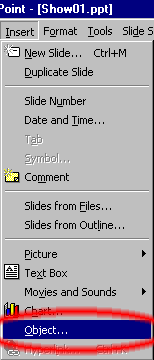 
|
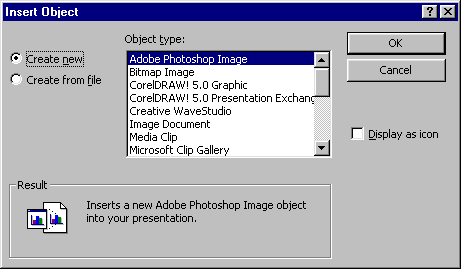
| 6 |
Click on Create from file and the following
will appear
|
| 7 |
Click on the "Browse" button and
navigate to your first presentation that you want displayed when you run the show.
|
| 8 |
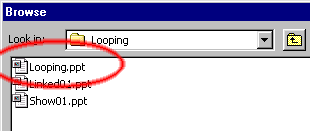
Click on your first presentation (in this case Looping.ppt)
and click OK.
|
| 9 |
Click on "Link" and you should see
the following

|
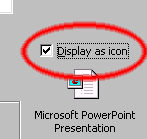
| 10 |
Click on "Display as icon" and
then click the "OK" button
|
| 11 |
The following icon will appear

|
| 12 |
Click and drag the icon off to the edge of your page

|
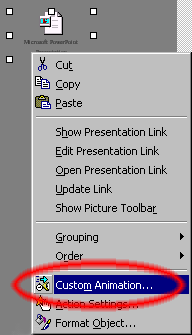
| 13 |
You've successfully linked a presentation into your show
presentation.
Now to tell powerpoint to display the linked presentation.
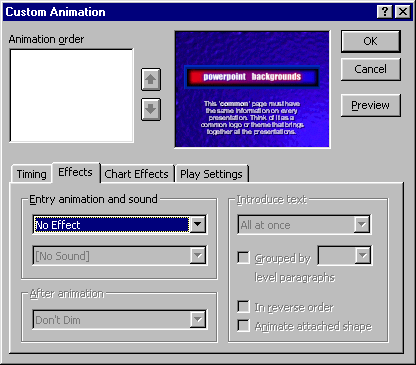
Right click the icon and select "Custom Animation"
|
| 14 |
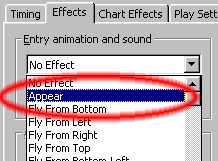
Change the "Entry animation and sound" from
"No Effect" to "Appear"
|
| 15 |
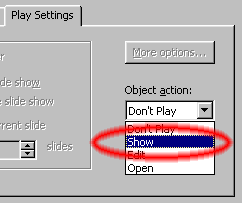
Click on the "Play Settings" tab, change the
"Object action" from "Don't Play" to "Show"
|
| 16 |
Click on the "Timing" tab, make sure that the
"Start animation" is set to "Automatically" and "0" seconds
after previous event. This way powerpoint will automatically load your linked presentation
without any user intervention.
|
| 17 |
As an extra step you could add a note to yourself, again off
the edge of the screen, just above the powerpoint icon. For example:
 |
| 18 |
To link in the rest of your presentations. Copy this slide by
choosing the "Insert" menu, and select "Duplicate Slide". Delete the
powerpoint icon at the edge of the screen.
Repeat steps 5-17
|
| 19 |
For each linked presentation you must add the "common"
slide as the first and last slide. So powerpoint will display the same slide when it jumps
from each linked presentation and back to the "show01.ppt" presentation.
|
| 20 |
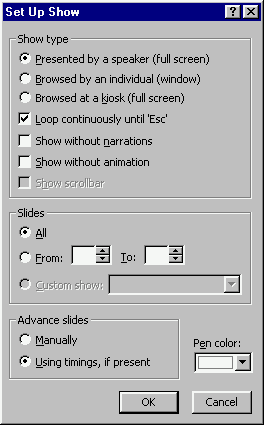
To make your "looping" presentation loop: Choose
the "Slide Show" menu, click on "Set Up Show", make sure "Loop
continuously until Esc" is ticked.
Under "Advance Slide" tick "Use timings if present"
|
| 21 |
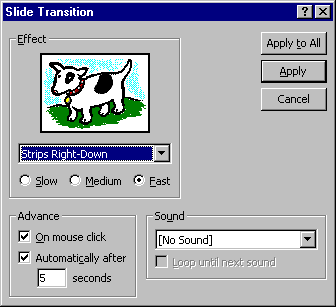
To tell powerpoint how long to display each slide: Choose
the "Slide Show" menu, click on "Slide Transition", Under the
"Advance" settings, Tick "automatically after x seconds":
Typically about
5 seconds is long enough to display a logo.
10 seconds for a couple of lines of text.
15 seconds for a page full of text.
Make sure the "On mouse click" is ticked also. This will give you to option
of advancing the slides using the keyboard or mouse if you so require.
|
| 22 |
Save It That's it!
To display the actual show, all you need to do is load the file called
"show01.ppt" and display it. Please note when you load the presentation
powerpoint will display "this presentation contains links - Do you want to update
them"...Always choose "Yes" to this question. Powerpoint will do the rest.
To stop the looping presentation just press "Esc" on the
keyboard once and powerpoint will exit from the looping presentation back into show01.ppt.
press the right cursor key/left mouse button to continue the presentation as you normally
would and your into your next presentation.
Just use the mouse button or the right cursor key to move forward through the normal
(non-looped) presentation. Remember that to move from a linked presentation to the next
presentation you will have to click 3 times for powerpoint to display the
next presentation.
The first click will move back to the "show01.ppt" presentation
The second click will move to the next slide in "show01.ppt", powerpoint will
then automatically load the next presentation. So you may want to wait half a second
before pressing for the 3rd click.
The third click will move from the "common" slide in the linked presentation to
the first real slide.
Phew! |
Download free awesome backgrounds for powerpoint

|